Sourdough starter
Equipment
- Fermenting Airlock Lid Optional, but very useful! Can also use a cotton cloth & rubberband
- Flat Silicone Spatula Optional, but very useful!
- Wide Mouth Canning Funnel Optional, but very useful!
Ingredients
- 3 Cups Water this is the total you will use over 7 days
- 3 Cups All-Purpose Flour this is the total you will use over 7 days
Instructions
Day 1 – Make The Starter
- Mix ½ cup water and ½ cup flour in your jar. Mix until smooth, it may be thick and paste-like. Top with a fermentation lid.3 Cups Water, 3 Cups All-Purpose Flour
Day 2 – Watch The Fermentation!
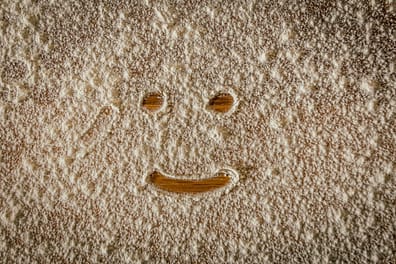
- Today, you don't need to take any action. You may see bubbles starting to appear, this is normal. Start thinking of a name for your starter.
Day 3 – First Feeding
- Remove half the starter from your jar. You can save this for baked goods, or toss it in the trash. Add ½ cup flour and ½ cup water to your jar, and mix well. Cover with a fermentation lid.3 Cups Water, 3 Cups All-Purpose Flour
Days 4 – 7 – Feed Daily
- Repeat the same process as day 3 on days 4, 5, 6 & 7:Remove half the starter from your jar. You can save this for baked goods, or toss it in the trash. Add ½ cup flour and ½ cup water to your jar, and mix well. Cover with a fermentation lid.3 Cups Water, 3 Cups All-Purpose Flour
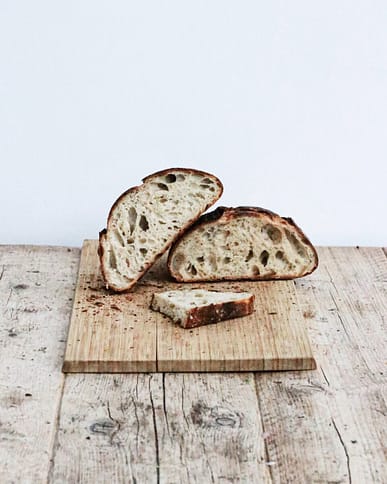
Day 8 – Ready To Bake!
- Your starter should now be very active with lots of bubbles. Start using this in recipes. You will want to continue the feeding schedule to keep the starter alive. Read this post to learn about how to keep the starter alive.
The nutrition facts provided on this site are only an estimate and are provided for convenience and as a courtesy only. The accuracy of the nutrition facts for any recipe on this site is not guaranteed. It should not be used as a substitute for a professional nutritionist’s advice.
Video
Angie’s Notes
- Once you are comfortable with all-purpose flour sourdough, experiment with other flours – I’ve heard rye or wheat make great sourdough!
- After 7 days, keep your starter active for as long as you need it for baking, you can place it in the fridge to slow the fermentation and feed it less.
Like This Sourdough Starter Recipe? Share It or Subscribe via email!
Why I Love This Sourdough Starter Recipe
Before I read Attainable Sustainable by Kris Bordessa, I thought sourdough was difficult and I never would want to try it. After reading her book and trying other ferments, I decided to try sourdough. WOW, not only is sourdough pretty easy, it’s relatively affordable and hands-off.
This week I’ll share additional information that I wish I would have known my first time making a sourdough starter.
Helpful Tools For Sourdough Starter
First and foremost, be kind to yourself with the starter. If it ends up being moldy, note where you may have gone wrong, and try again.
Below is a short list of items that I found super useful in starting sourdough.
Fermenting Air Lock Lid – you can certainly use a cotton cloth (I found mine at the dollar store) and a rubber band. You really just need something that will allow your starter to breathe, but keep out the bugs. After a few days, my cotton cloth began to stick to the rim of the jar. Having a fermenting airlock lid will eliminate the “stick”.
Flat Silicone Spatula – by using a flat spatula I was able to easily “tamp down” my sourdough bubbles as well as scrape the sides of the jar. Scraping the side of the jar is important so you don’t end up growing mold or having a dried sourdough starter on the walls.
Wide Mouth Canning Funnel – this tool was a game changer. It was challenging to get the correct amount of flour into the mouth of my jar, this funnel helped tremendously. Bonus – this funnel can be used anytime you need to put something into a wide-mouth jar!
I hope you found my sourdough starter tips helpful, continue reading to learn how to “save” your sourdough starter.
Saving Your Sourdough Starter
After 7 days of feeding your starter, you will be eager to make all things sourdough – bagels, bread, and english muffins to name a few. But what about after the 7 days? Will you still want to feed your sourdough every day if you aren’t planning on baking? If you are like me, the answer is no.
After some research on the internet, I was able to find a few ways to slow or save my sourdough starter so I didn’t have to continue to feed it daily.
Dry Your Sourdough Starter For Later – place a thin layer of your sourdough starter on a silicone-lined baking sheet and place it into a cold oven with only the oven light on. That’s right – turn the oven light on in the oven and place your tray inside. The light gives off enough heat to slowly dry your sourdough starter! Be sure to add a note on your oven so no one accidentally turns it on. You’ll know it’s dry when it cracks like a potato chip. Store in a jar with a desiccant to ensure any moisture is absorbed.
Put Your Sourdough Starter In The Fridge – to slow down the feeding schedule, place the sourdough starter in the fridge. After feeding, place directly into the fridge. A few days before you plan to use the starter, allow it to sit out for a few hours, then feed it as normal for a few days to ensure it’s active. Note, you should feed at least every 2 weeks while in the fridge, though I’ve heard people go months without feeding.
My final tip is when you want to wind down your sourdough starter, take the time to do both of the methods above. This way, in case 1 method fails, you have a backup.
Subscribe And Be Notified Of Every New Post
Follow Me On Social Media!
Did you find this interesting or useful? You may have noticed my site is ad-free and easier to navigate than most. That’s because I want to provide a better experience when researching gardening or recipes! Please support my site by donating.